Getting Started
- List of Maps
- Registering on HabitatMap
- Adding the Maps to Your HabitatMap Account
- Viewing Maps
- Adding an Asset to the Map
Maps
NEN created maps for 14 communities as part of this project. Feel free to browse them to see resources available to young people in other areas.Step One: Getting to HabitatMap.org
Select the map you're interested in from the list provided under the 'List of Maps' tab. You will notice a black bar at the bottom of the map that says "Visit HabitatMap.org to contribute to this map." Click on that bar. You will be taken to the 'editable' version of the same map, so that you can add new locations or edit information already there.
Step Two:
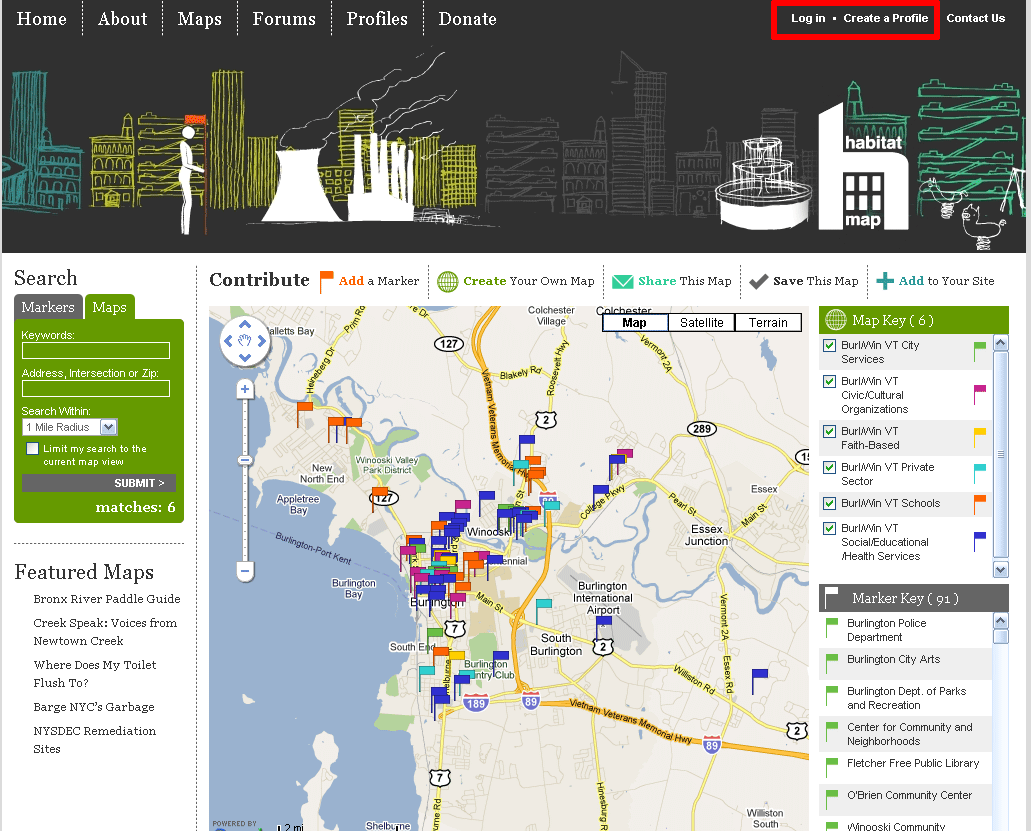 Once you are on the HabitatMap site, you must login or register to begin working with the maps.
Step Three: Register
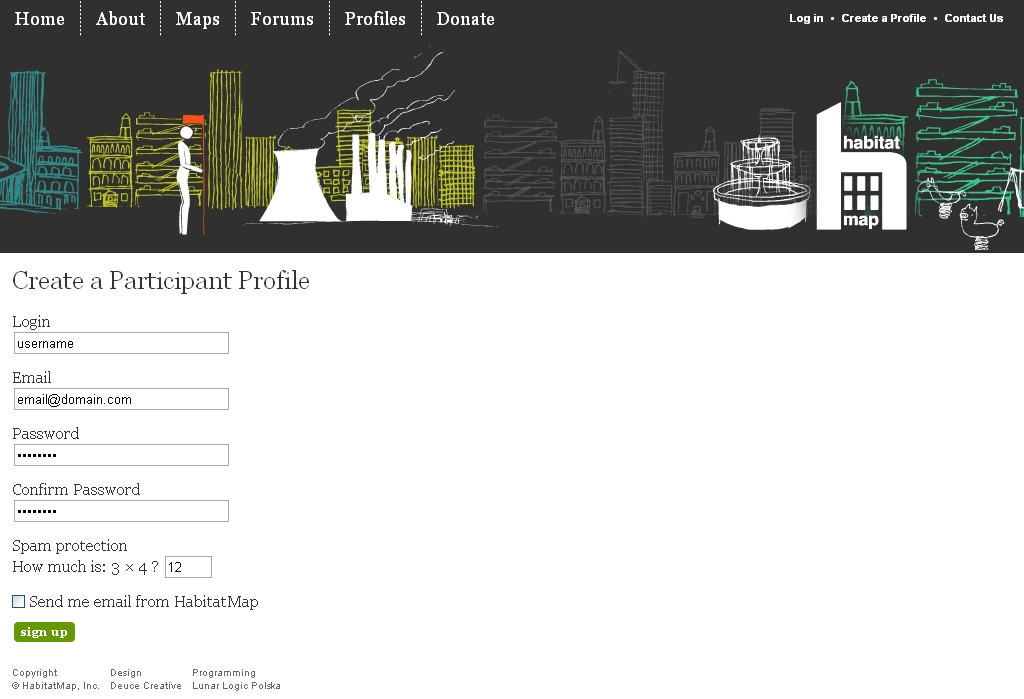 To register you must enter a login/username, email, and password.
Adding a Map to Your Profile
 Just a quick note: DO NOT click on the 'Save This Map' button; that will create a duplicate map and any changes you make will not be reflected on the map that is shown on the real map.
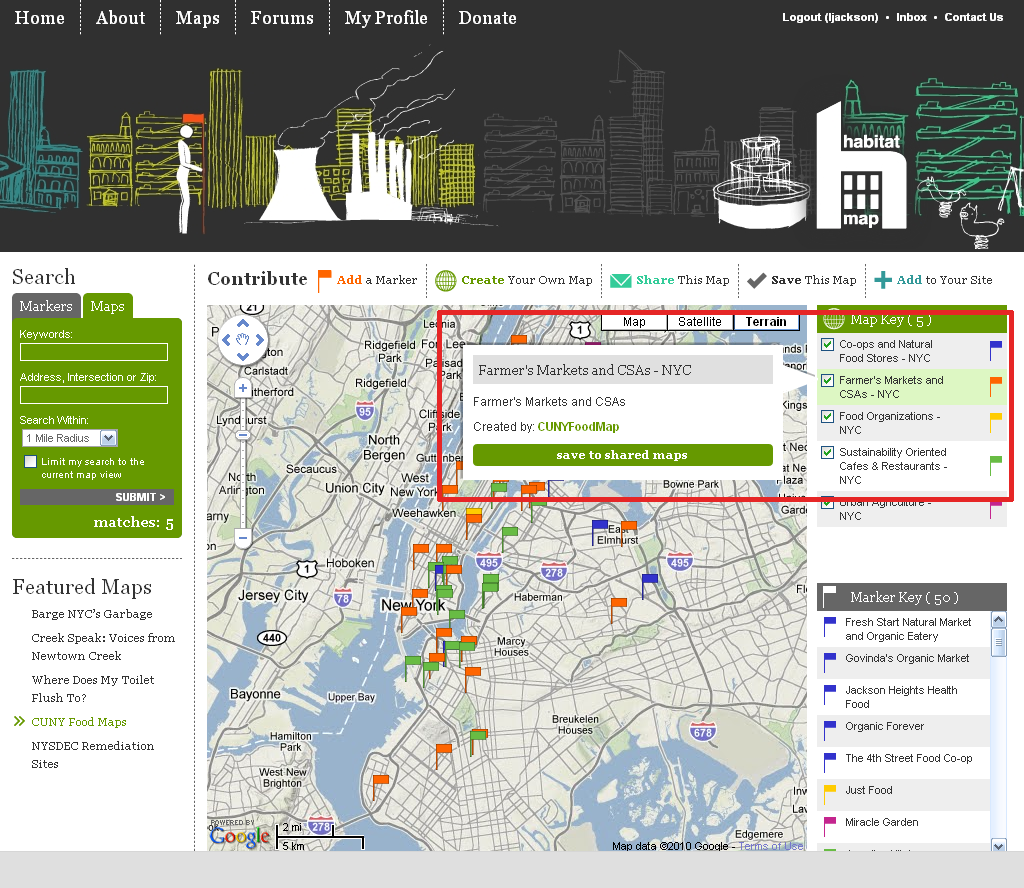
Each city or town is an amalgam of six separate maps, though this isn't apparent to most viewers. The first time you add to or edit a map, you must add the various component maps to your account. Don't worry; this couldn't be simpler. When you've logged in and are on your editable map, go to the 'map key' feature in the upper right quadrant. Hover your cursor over each map (City Services, Faith-Based, Private Sector, etc.) and click on 'save to shared map.' When you've done this for all six maps, you're ready to edit.
Viewing Your Maps
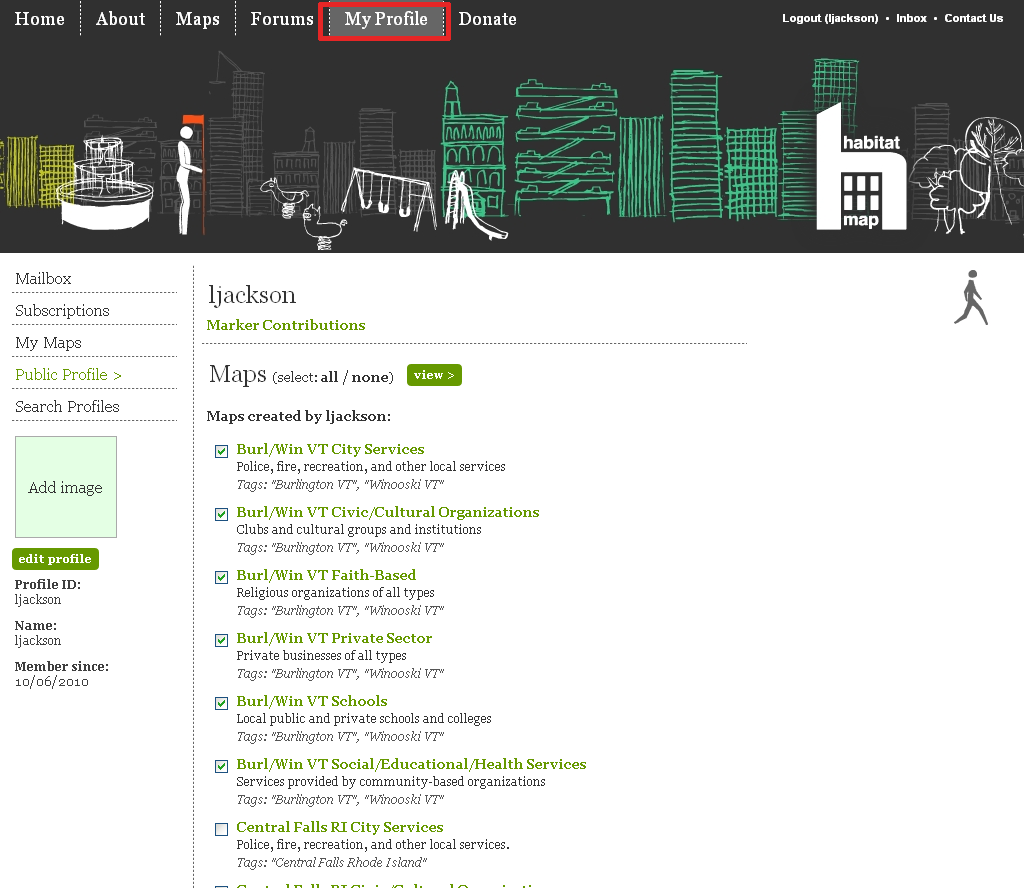 If you go to HabitatMap.org and log in without having followed a specific URL to get there, then you'll have to click on
'My Profile' and then click on the component maps you've previously downloaded. Then click 'view.' You should only have to
do this once. You're ready to edit.
If you go to HabitatMap.org and log in without having followed a specific URL to get there, then you'll have to click on
'My Profile' and then click on the component maps you've previously downloaded. Then click 'view.' You should only have to
do this once. You're ready to edit.
Adding a Marker
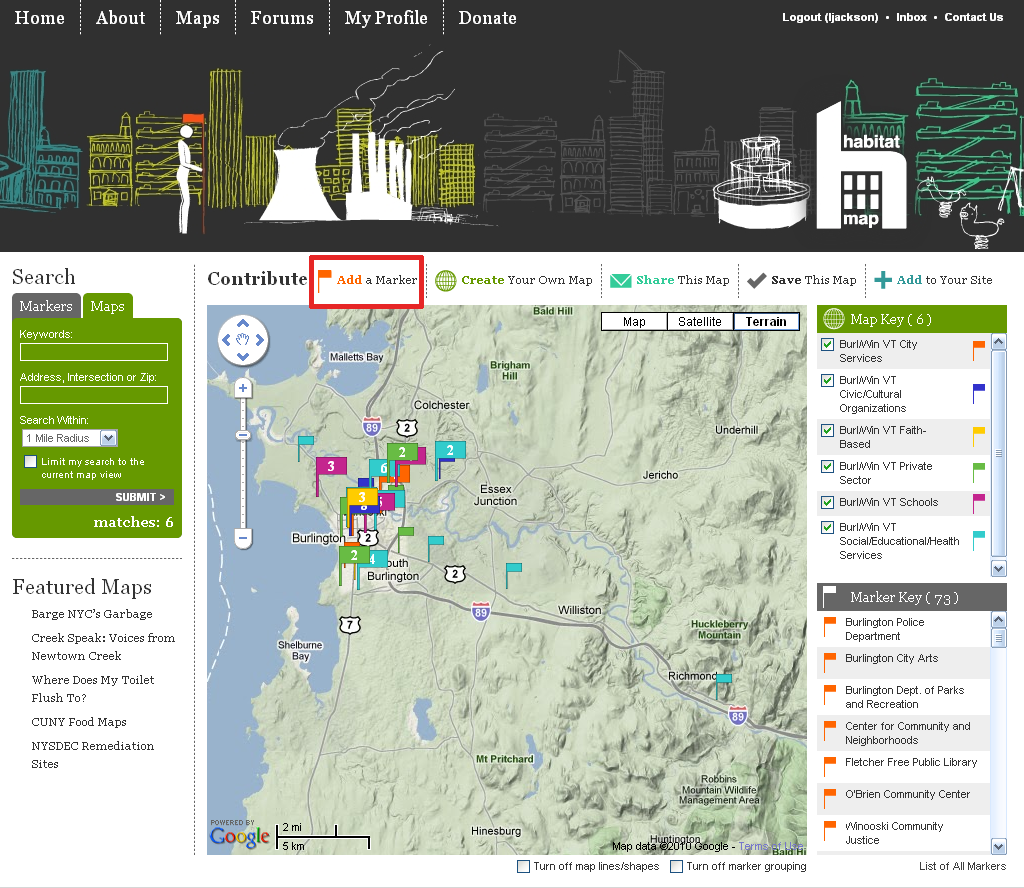 To add a marker to a map you must be on a map. Right above the map click on the button that says "Add a Marker".
Filling in the Marker
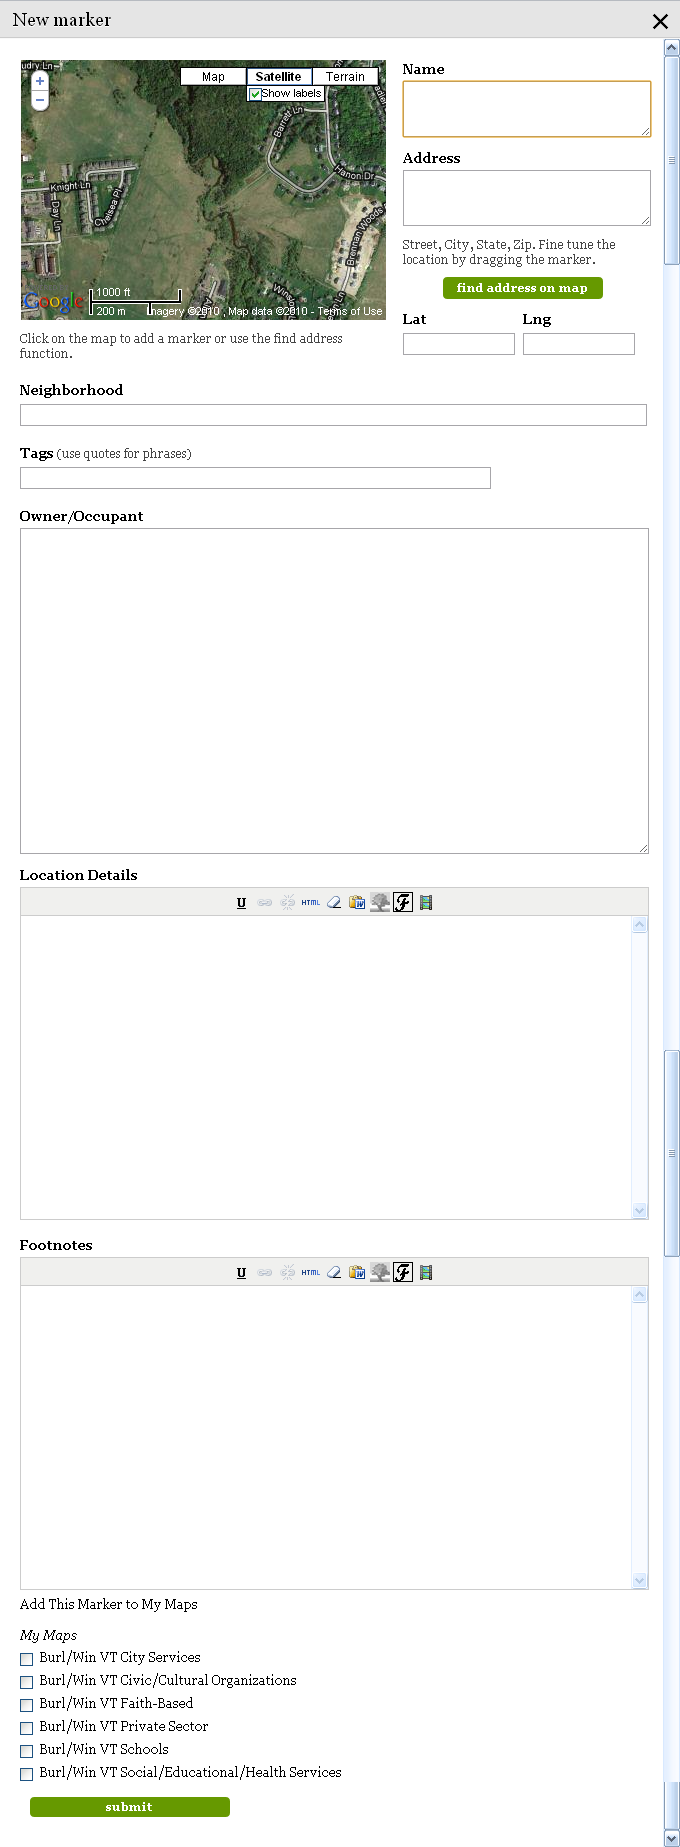 Once the pop-up drops down, you can begin filling in the information. 'Name' refers to the name of the organization, business, or asset.
To add the address you must enter in the street address, including city, state, and zip code. Click the 'find address on map' button.
'Neighborhood' is a required field in HabitatMaps; if you don't want to name a neighborhood, enter 'N/A.' 'Tags' refer to the city and state
(for instance "Burlington VT"). Put this in quotes. In 'Owner/Occupant,' rewrite the organizaton's name and link it using the 'link' icon.
In 'Location Details,' add a descripton of the organization, what it does for youth, and anything else you want people to know. 'Footnotes'
is a place to list partners and supporters. The last thing to do is to select the map you want to add this to; your list is directly underneath
the pop-up box you've been adding information to. For instance, if you have just added 'Burlington High School,' you would check the map labeled
"Burl/Win VT Schools." When mapping the assets we tried to find one category to put each asset in, it is possible a location will fit into
multiple categories, if this is the case just check off as many categories that are applicable. After you have
filled in all of the information you can then scroll down to the bottom of the page and click "Submit" to save the location.
Once the pop-up drops down, you can begin filling in the information. 'Name' refers to the name of the organization, business, or asset.
To add the address you must enter in the street address, including city, state, and zip code. Click the 'find address on map' button.
'Neighborhood' is a required field in HabitatMaps; if you don't want to name a neighborhood, enter 'N/A.' 'Tags' refer to the city and state
(for instance "Burlington VT"). Put this in quotes. In 'Owner/Occupant,' rewrite the organizaton's name and link it using the 'link' icon.
In 'Location Details,' add a descripton of the organization, what it does for youth, and anything else you want people to know. 'Footnotes'
is a place to list partners and supporters. The last thing to do is to select the map you want to add this to; your list is directly underneath
the pop-up box you've been adding information to. For instance, if you have just added 'Burlington High School,' you would check the map labeled
"Burl/Win VT Schools." When mapping the assets we tried to find one category to put each asset in, it is possible a location will fit into
multiple categories, if this is the case just check off as many categories that are applicable. After you have
filled in all of the information you can then scroll down to the bottom of the page and click "Submit" to save the location.
To edit a marker (even one you did not create yourself), click on the marker, wait for the pop-up box to appear, and click on the 'Edit Marker' link. Note: you cannot delete markers that others have entered.